If you’re looking for a unique and heartfelt gift for your mother, consider giving her a Storyworth subscription. Storyworth is a platform that helps preserve family memories by capturing stories and conversations with loved ones.
Last Christmas, I gifted my parents a Storyworth subscription and it’s the best thing I’ve done…for myself. 🙂 Each week they received a question by email and they simply responded to the prompt with a memory, story, or thought. At the end of the year, you receive a hardcover copy of the book (and can order more).
I LOVED receiving new stories each week and will cherish these books forever. I learned so many things I never knew about my mom and dad and the rich history of their lives.
Here’s how you can gift your mom a Storyworth subscription:
Visit the Storyworth website: Start by visiting the Storyworth website and selecting the “Gifts” option from the top menu. You’ll be directed to the Storyworth gift page, where you can choose the subscription plan that works best for you and your mother.
Choose the subscription plan: Storyworth offers several subscription plans, ranging from one month to a full year. You can choose the plan that fits your budget and the length of time you’d like your mother to receive Storyworth prompts.
Personalize the gift: Next, you’ll have the opportunity to personalize the gift by writing a message to your mother and selecting a gift card design. You can also choose the delivery date of the gift.
Enter your payment details: Enter your payment details, including your name, email address, and billing information.
Gift the subscription: Once you’ve completed the payment process, your gift subscription will be sent to your mother via email on the date you selected. She’ll receive a welcome message with instructions on how to activate her subscription and begin the storytelling process.
Encourage your mother to participate: Encourage your mother to participate in the Storyworth process by responding to the weekly prompts she receives via email. Storyworth prompts are thought-provoking questions that help spark memories and stories from the past.
Collect and share the stories: As your mother responds to the prompts, Storyworth will collect and compile her stories into a beautifully designed hardcover book. You can also choose to receive weekly updates on your mother’s responses and share the stories with other family members.
Gifting your mom a Storyworth subscription is a thoughtful and unique way to capture and preserve family memories. It’s a gift that keeps on giving, and your mother will appreciate the opportunity to share her stories and memories with you and future generations.
ASK your mom first if she’s willing and able to answer. It’s a way for them to leave a legacy., but you don’t want it to be a burden.
OFFER to help edit, add pictures, make final purchase so the only thing they have to worry about is writing.
CUSTOMIZE the questions to make sure thing pertaining to their life are covered.
*Disclosure: This is a referral link, so you’ll receive $10 off and I’ll receive a book credit so I can order additional copies of the books for my siblings and kids. $10 off is the best deal they offer and I appreciate you using my link!
Other Mother’s Day Gift Ideas
Mother’s Day is a special occasion to celebrate and honor the mothers in our lives. It’s a time to show our appreciation and love for all that they do for us. If you’re looking for Mother’s Day gift ideas, a Storyworth subscription is just one option to consider.
Other Mother’s Day gift ideas include personalized gifts such as custom jewelry or a monogrammed robe, relaxation gifts like a spa day or a massage, and sentimental gifts such as a photo album or a family tree.
You can also consider practical gifts that your mother will use and appreciate, such as a new kitchen appliance or a fitness tracker. Subscription boxes tailored to your mother’s interests, like beauty or food, are also a great option.
If you’re on a budget, handmade gifts like a DIY flower arrangement or a homemade candle can be a thoughtful and meaningful gesture. And don’t forget the power of a heartfelt card or letter expressing your love and gratitude for all that your mother has done for you.
Providing a meal and a space to gather or a pot of flowers is one of my favorite ways to celebrate Mother’s Day.
No matter what gift you choose, remember that the most important thing is to show your mother that you care and appreciate her. Take the time to find a gift that truly reflects her interests and personality, and she will surely cherish it for years to come.
Sounds too good to be true, right? It truly can be this simple if you follow the easy steps listed below.
Why should you listen to me?
I have 7+ years of experience in “credit card hacking” which simply means I take advantage of bonus sign-ups and maximize my rewards by using the “right” card for the “right” purchase at the “right” time. I’ve earned thousands of dollars of rewards in that time, but I realize most people don’t want to put in the time and energy to track everything I do to make my system work. I often have people ask how they can get started with earning credit card rewards, so instead of making it super-complicated, I’m going to lay out the most SIMPLE one available right now that has no fees.
If you are not taking advantage of credit card rewards at all or don’t like the limitations on redeeming on your current card, this is an EASY way to start.
If you spend $500/month on groceries, you can earn $500 in the next 12 months.
Steps to Follow
First, apply for the Chase Freedom Unlimited Card which is offering a $200 bonus when you spend $500 (on anything) in the first 3 months and 5% cash back on groceries for the first 12 months. There is NO annual fee!
Once you get your card (mine took less than a week to arrive), use that card for ALL purchases at your grocery store (Target and Walmart don’t count…Fareway, Hy-Vee, H-Vee Dollar Fresh, Aldi, Kroger, etc. do). You can use it for other purchases too to earn even more cash.
PAY OFF YOUR CARD in full every month before the due date. Don’t charge anything you don’t have money for IN YOUR ACCOUNT. If you have had trouble in the past, try paying your card online every time you make a purchase to make sure you stay on track. I use auto-pay so I never miss a deadline.
Rewards are posted to your account. Redeem for CASH either as a deposit in your checking account or as a statement credit. They don’t expire! You can get better bang for your buck using them for travel, but I think that’s where people get confused, so for my purposes here, I’m just assuming you straight-up cash out.
That’s all!
The link shows you 2 different cards with very similar benefit- the Chase Freedom Unlimited card and the new Chase Freedom Flex card. Either one will get you that $500+, but see below for my recommendation.
When you spend $500 in the first 3 months, you get a $200 cash-back bonus.
When you spend $500/month for 12 months at grocery stores, get 5% back ($25/month) or $300 in a year.
That’s $500 in 1 year just for buying your usual groceries!
How to earn even more cash:
The 5% back on groceries works on up to $12,000 in grocery purchases in the first year, so if you buy $1000 of groceries/month instead of $500, you could earn $600 instead of $300
Get 3% cash back on dining purchases and 2% on drugstores
The Freedom Flex (Mastercard) gives you 1% on all other purchase, Freedom Unlimited (Visa) gives you 1.5% on all other purchases, so start with Freedom Unlimited if you don’t have that card.
What could prevent you from getting this deal?
You are not guaranteed to be approved for the credit card if your credit score is too low, your credit report shows you delinquent on payments, or you’ve opened too many cards lately (Chase unofficially has a rule that you can’t open more than 5 cards in 24 months). You also can’t currently have the SAME exact card already open (unless you put it in your spouse’s name)
Applying for a card WILL trigger a hard pull on your credit which is only a big deal if you have mediocre credit and need to apply for a major loan (mortgage, car, etc.) in the near future.
You SHOULD NOT do this deal if you can’t trust yourself to pay your card on time or feel you will overspend if using a credit card vs. cash, etc. I ONLY recommend this deal to people planning on simply converting their REGULAR spending to this card to take advantage of the better rewards.
Using my link and getting approved for the card may result in me receiving a referral bonus. You are free to search for the deal on your own, but if you found this information helpful, I appreciate you using my link. I am also willing to help with any questions you have along the way! You can find me on my facebook page: https://www.facebook.com/WorkingMomHacks/
If you have $4000 in expenses in the next 3 months, here’s a way to earn $545 minimum in cash.
Why should you listen to me?
I have 7+ years of experience in “credit card hacking” which simply means I take advantage of bonus sign-ups and maximize my rewards by using the “right” card for the “right” purchase at the “right” time. I’ve earned thousands of dollars of rewards in that time ($2500+ in 6 months), but I realize most people don’t want to put in the time and energy to track everything I do to make my system work. I often have people ask how they can get started with earning credit card rewards, so here is THE ONE to do. It’s the best sign-up bonus currently available and I will make it as SIMPLE as possible for you.
If you are not taking advantage of credit card rewards at all or don’t like the limitations on redeeming on your current card, this gets you the most bang for your buck without being overly complicated.
Once you get your card (mine took less than a week to arrive), use that card to pay for your everyday purchases to reach $4000 in total spend in 3 months from your approval date. Here are some ideas for spend:
Groceries, Gas, Clothes, Household expenses, Car Repairs (we bought appliances)
Streaming services, subscriptions for the next 3 months
Auto Insurance (6 month premium knocks out some good spend)
Property Taxes if you’re not under escrow (2.25% fee in my county, but you’ll get 1% of that back, so it’s a small fee to knock out a big chunk of your spending)
NOTE: The $95 annual fee IS charged right away and does NOT count as part of the $4000 spend. You can cancel the card after you get the bonus and before your annual fee posts next year if you want.
PAY OFF YOUR CARD in full every month before the due date. Don’t charge anything you don’t have money for IN YOUR ACCOUNT. If you have had trouble in the past, try paying your card online every time you make a purchase to make sure you stay on track. I use auto-pay so I never miss a deadline.
Your 60,000 bonus points will post to your account on the statement after you reach $4000 in spend. Redeem for CASH either as a deposit in your checking account or as a statement credit. You can get better bang for your buck using them for travel or one of the temporary “Pay Yourself Back” categories, but I think that’s where people get confused, so for my purposes here, I’m just assuming you straight-up cash out.
When you spend $4000 in the first 3 months, you get 64,000 points (60,000 sign up + 1 per $ spent minimum)
If you redeem this for cash, it’s worth $640!!
Subtract the $95 fee and you’ll net $545 minimum. That’s 13.6% of your spend back in cash.
If you redeem for travel instead of cash, the 64,000 points would be worth $800, so after the $95 fee it’s a $705 net + $50 hotel credit = $755 in value.
How to earn even more cash:
Earn up to $50 in statement credits each account anniversary year for hotel stays purchased through Chase Ultimate Rewards® and Earn 5x total points on travel purchased through Chase Ultimate Rewards® portal.
I have done this and the hotel credit works. Besides this credit I don’t actually recommend booking through the portal–booking through a 3rd party is always a risk that something won’t go right on your reservation and you’ll get the run around.
Earn 2x on other travel purchases. (Although I don’t use the portal, I DO recommend putting direct travel purchases on this credit card because it has excellent travel/delay/luggage/rental car coverage.
Earn 3x points on dining, including eligible delivery services, takeout and dining out
Earn 3x points on ONLINE grocery purchases (excluding Target, Walmart and wholesale clubs).
Earn 3x points on select streaming services.
Plus, earn 1 point per dollar spent on all other purchases.
What could prevent you from getting this deal?
You are not guaranteed to be approved for the credit card if your credit score is too low, your credit report shows you delinquent on payments, or you’ve opened too many cards lately (Chase will deny you if you’ve opened 5 credit cards in the past 24 months). You also can’t have received a bonus for a Sapphire card in the past 48 months and can’t currently have an open Sapphire Preferred or Sapphire Reserved Card.
Applying for a card WILL trigger a hard pull on your credit which is only a big deal if you have mediocre credit and need to apply for a major loan (mortgage, car, etc.) in the near future.
You SHOULD NOT do this deal if you can’t trust yourself to pay your card on time or feel you will overspend if using a credit card vs. cash, etc. I ONLY recommend this deal to people planning on simply converting their REGULAR spending to this card to take advantage of the better rewards.
Using my link and getting approved for the card may result in me receiving a referral bonus. You are free to search for the deal on your own, but if you found this information helpful, I appreciate you using my link. I am also willing to help with any questions you have along the way! You can find me on my facebook page: https://www.facebook.com/WorkingMomHacks/
You can CANCEL this card before the next annual fee hits so you don’t pay the $95 each year but I have held onto this card for the travel protections and the increase in Chase Ultimate Rewards values it provides.
In August, 2021, our family of 5 (mom, dad, 11yo boy, 8yo boy, 6yo girl) took a week-long trip to Branson, MO and had a great family summer vacation. To highlight the trip and help other families build an itinerary, here are some details of the trip.
Day 1- Saturday: Drive and Bass Pro Shops
Left NW Iowa at 8am and ate a picnic lunch in the van on the way. It was 93 degrees and the van had some trouble with A/C which we know know could have been avoided if we’d known to use the “recycle air” button next to the A/C to keep the cool air in the van instead of pulling in hot air to cool.
Bass Pro Shops, Springfield
We stopped at Bass Pro Shops in Springfield, MO from 4:00-5:30pm which was pretty cool- they have a HUGE moose statue and lots of taxidermy animals on display, turtles, and a whole section that seems like you’re at the bottom of a lake. Worth a stop. We did not got to the Wonders of Life aquarium next door as it seemed pretty expensive, and did not stop at Lambert’s Cafe (home of throwed rolls) on this trip just because we didn’t come through during a meal time.
We drove on to Branson and checked into our AirBnB at Notch Estates. This is listed as “Silver Dollar Refuge” in Reeds Spring, MO and that was a perfect description! It was a terrific spot for our family–very spacious. 3 beds in the kids room so they each had their own, room for 5 at the dining table (things I looked long and hard for) and a perfect quiet location that was near Walmart (I did a big grocery run the night we arrived) and very close to Silver Dollar City. It had a small catch and release pond (too hot while we were there) and 2 pools with nice deck and shade. Highly recommmend! Day 2 – Sunday – Silver Dollar City/Marvel Cave
Powder Keg (my one and only time. Kids did several times!)
We opted to buy a 3-day 2-park pass directly from Silver Dollar City and feel like we definitely got our money’s worth. We arrived at SDC before opening so we could watch the tribute to Veteran’s and then hit the popular rides in the morning: Fire in the Hold, PowderKeg, American Plunge, Swings, watched the Harlem Globetrotter’s show in A/C, Flooded Mine. Went back to the condo for lunch and to cool off. Came back and waited in line for the Marvel Cave tour (you do need to get in line early!). The cave was awesome! A huge cavern that they once flew 3 hot air balloons in! After the cave we did Thunderation, played at Fireman’s Landing, ate supper in the park then listened to the Eastern Heights concert, watching fireworks from Echo Hollow until 9:30pm.
Day 3 – Monday – Buffalo River in AR
Floating down the Buffalo River
After a big breakfast, we drove 2 hours to the Buffalo River past Yellville, AR. Very windy roads!! The outfitters we used were a little rough around the edges but there were several other options. We really had a great day slowly floating down the river, stopping to explore caves and rock formations. Highly recommend water shoes because it is rocky! Stayed at the beach where our van was parked, then drove back with a stop at Sonic in Yellville. Swam in the pool that night. If you get a chance to float the Buffalo River, do it!
Day 4 – Tuesday – White Water Water Park / Pizza Ranch / Sights & Sounds Theater
As part of our 3-day pass, we could visit the White Water Water park. Had a fun time–kids liked the wave pool the best. The lazy river kept closing and some of the slide lines were long.
We were ready to go by 3pm and we headed to the Pizza Ranch Buffet & FunZone Arcade since it has buffet all day and Tuesday you can get a free Kid’s Buffet with each Adult’s buffet. Great food and had fun playing in the arcade.
While there, we made a last-minute decision to buy tickets to the Jesus show at the Sights & Sounds theater. The show was amazing with a great cast, incredible set and even live animals. Highly recommend going to see whatever they are showing!
Day 5 – Wednesday – Hatchery / Ballparks of America / Branson Belle
Public Fishing near Fish Hatchery/DamFish Hatchery
We visited the Shepherd of the Hills Fish Hatchery and checked out the public fishing spot nearby (didn’t fish, but fun to skip rocks). Tip: bring quarters AND A SOLO CUP for fish food so you don’t have to hold it in your hands! It is also closed Sun & Mon! The hatchery was okay (nothing like Spearfish) but I think a few things were closed due to high covid cases at the time.
Ballparks of America
My husband and oldest son then caught a Little League game at Ballparks of America (right by White Water Water park) while the rest of us swam.
Then we all dressed up for dinner and a show on the Branson Belle. The boat never actually left the dock due to high winds, but it was still fun. Food wasn’t as good as I’d remembered, but a fun experience and the mentalist (Christopher James) was fascinating. We had seen a deal where you could call to add Branson Belle tickets to your Silver Dollar City tickets, so check if that deal is available.
Day 6 – Thursday – Silver Dollar City
Fireman’s Landing at Silver Dollar City
Since we’d been here before, we now knew what rides we really wanted to do again. This time we did Mystic River Falls (go at park open for shorter lines), Fire in the Hole, PowderKeg, Tom & Huck Water Blast, American Plunge and the Frisco Train. Then home for lunch and to change into dry clothes (we did all water rides in the morning and it was hot enough we didn’t mind being wet, but changing was a good idea). In the afternoon we saw Sadie’s Wild West River, all the Grand Exposition rides (great for those middle kids who don’t love the huge thrill rides), Fireman’s Landing (they loved the ball room where you shoot from air guns and collect foam balls), PowderKeg.
We left and ate summer at home because we had tickets to Hamner’s Unbelievable Family Variety Show that night. The show was a little past-it’s-prime and the low ticket price was reflective of quality. The kids did like the aerialist and the guy on a giant ring. But our 6yo fell asleep in the front row and we were too close to the magic and could see many of the “tricks”. The singers catered to a much older crowd (Sammy Davis, Jr. impersonation??). I’d choose something different, but we were probably spoiled by the quality of the Jesus show.
We went to Copperhead Mountain Coasters first thing in the morning to avoid the lines. We each did 2 rides and really liked it. Our 11-yo’d favorite part of the trip. I had purchased BOGO tickets online in advance from bransonshows.com but you have to pick up your tickets on the strip when you arrive (got the Hamner’s tix there too). It was one of those high pressure “book all your tix” places once you walked in, but I held firm because I’d already booked all our other tickets directly for cheaper. So, do your research on best place to buy and whether it’s worth the hassle picking up on the strip.
We went down to Branson Landing and saw the fountain’s (okay, but not worth a whole trip) and walked through Bass Pro Shop. We weren’t in the mood for much other shopping and weren’t planning to eat out, so we headed home to swim.
Then we cleaned up to go to Dolly Parton’s Stampede. You get to see the horses while in line and have a full meal and show. This was very fun and our daughter even got picked to do the Chicken Chase and won a medal for the North. Hwy 76 traffic was horrible after the show so we recommend taking the backroad when you can! We actually avoided the strip at night except for this night.
Day 8 – Saturday – Drive Home
We left by 8:30am and didn’t make many interesting stops on the way home–just Culvers past Kansas City, gas in Missouri Valley, and stopped in Sioux City for FB cleats and got home after 6 in time to unpack, make supper, get groceries. Glad we had Sunday to recover because my husband started school that Monday!
Things we didn’t do:
There is so much to do in Branson, so here are some ideas of things we didn’t do on this trip:
Table Rock Lake (didn’t swim or boat like most people do)
Fritz Adventure – Ropes course, zipline, climbing, etc. We already had our itinerary planned before finding out about this place but would have loved it. I’ve known other who recommended!
Mini Golf/Bumper Boats/Go Carts – seemed to be a lot on the strip but it was so hot in August
Hiking/Waterfalls – again, so hot in August
Tourist attractions like Titanic Museum, many others on the Strip
Shopping like at Tanger Outlets, Dick’s 5 and Dime. Kids each picked 1 souvenir at SDC.
Dining out–we cooked a lot of our meals at the condo except when dinner was included with the attraction, one night at SDC, Pizza Ranch buffet (which was our lunch and supper) and the drive home. This saves us a lot of $ as a family of 5. We also brought waterbottles and snacks wherever we were allowed to.
Adding Disney+ because a year’s subscription is cheaper than one ticket to Hamilton?
(Hamilton available July 3!)
Love Disney movies, Disney TV shows, Star Wars, Pixar, and the Simpsons?
Instead of paying $6.99/month ($83.88/year) for Disney Plus, here is a way to get it for $69.99 plus $12.50$22.50- Cash Back!
Easy steps to SAVE on Disney Plus subscription streaming service:
Sign in to your Rakuten (used to be ebates) account.
If you don’t have an account, use this link to sign up and you’ll get an EXTRA $10 back when you make your first purchase of $25+ (which you’re about to do).
Search for “Disney+” on the Rakuten site and click on any of the “Shop Now” buttons to activate $12.50 cash back when you purchase an annual subscription.
Using the window that just opened (this is important!), click the link for either the hulu + ESPN + Disney+ bundle (this gets you $10 cash back) or click the link “Sign up for Disney+ Only”. Follow the instructions to enter an email and password.
On the next screen, select the Annual subscription for $69.99. (This saves you 16% over the monthly charges)
Enter your Credit Card or PayPal information to be charged when your Free Trial is over.
(EDIT: This deal is over but if you’re reading this later, check if your Chase Freedom card has any bonus categories). If you have a Chase Freedom card and are reading this Jan-March of 2020 USE THIS CARD to get 5% cash back on streaming services! Also works for Netflix, Hulu, etc. This gets you $3.50 cash back on an annual subscription to Disney+
FAQ’s
If you are already on a monthly subscription, I think you have to cancel it and then re-purchase after it expires on the Annual Subscription basis. I have not found a way to convert from monthly to Annual.
Your Rakuten Cash Back Bonus will be put in your account a few days after your purchase goes through. They pay out quarterly either in a check or directly to your PayPal.
**
For more tips on saving money, follow me on facebook.
Meal Planning used to be one of my most-dreaded tasks. I would spend literally hours every week trying to cobble together recipes from Pinterest, cookbooks and facebook, write grocery lists, and then forget to do prep steps or misjudge how long a recipe would take from start to finish. I would spend precious time at work worrying about what to make for dinner or wondering if I had the groceries in the house for a complete recipe. I don’t hate cooking and have a deep desire to feed my family a variety of healthy meals, but I just didn’t know where to start.
For the past year (*UPDATE: I’ve now been a member over 2 years and still love it!), I’ve been using a super-affordable, convenient meal-planning service called “Meal Squeeze” to take all the guesswork out of planning healthier meals that my family will enjoy. It has literally been life-changing and is my #1 “working mom hack” that I recommend to everyone!
Here’s what you get for a $39/year Basic annual subscription:
Weekly Meal Plan for 7 Dinners and 1 dessert (choose 2,4,6,8 servings)
Includes meal AND sides, ready at the same time (one of my biggest weaknesses)
Most meals ready in 30 minutes or less if you do the weekend prep list (perfect for busy families)
Printable Grocery list that’s easy to customize (or download an editable version!)
Nutrition facts for all meals
Conversation Starters to make dinner meaningful family time
Access to lunch, snack, slow cooker and smoothies ideas
Members-only facebook group with cooking/prepping tips from a registered dietitian who will answer your specific questions! (one of my favorite perks)
$2 off $10 fresh meat/produce coupon good at Orange City, Sioux Center, Sheldon, Lemars, IA Fareway Food Stores. (this helps my subscription pay for itself) Limit your use to 1x per week!
$5 off $20 at Sioux Center, Le Mars, Storm Lake, IA Hy-Vee grocery stores. Limit your use to 1x per week!
My daughter LOVES to go grocery shopping with me!
If you’d rather go digital, a Premium Plan is only $10 more per year. At $49/year, it’s the most affordable meal planning service I’ve seen.
Additional services in Premium Plan:
Meal Plans are sent to ModernMeal website and app
Mobile grocery list you can customize and check off while shopping
Access to ALL past recipes with a search function (great for finding your favorites)
Ability to customize serving size on any recipe or filter by allergens (great when hosting)
Calendar to customize and add additional meals – plan breakfast, lunch and dinner
Basic Annual Subscription: $39 Annual or $5 Monthly
Premium Annual Subscription: $49 Annual or $7 Monthly
Click here to subscribe or use the Join Button below. Let me know what you think!
If you found my review helpful, I would super-appreciate you putting in my name “Courtney Boone” when it asks who referred you.
FAQ’s: Does your family like the meals?
My husband is not a picky eater, but has REALLY enjoyed the variety and healthier options without ever feeling like he was on a “diet”. The kids (age 5-10) are apprehensive about unfamiliar foods sometimes, but have discovered MANY new foods they enjoy (my 7-year-old LOVES roasted brussel sprouts!!) and the recipes are family-friendly. My goal is to give them lots of healthy options and teach them to try new things but I do modify once in a while, leaving a sauce off some things or offering the ingredients deconstructed.
Does it use a lot of weird ingredients my store doesn’t carry or I’ve never heard of?
I have found this to be much more “midwest/small-town” friendly than other services. I shop at Fareway Food stores and can find most ingredients. Hy-Vee carries all of the ingredients and shopping at bigger chains like Walmart, etc. will guarantee you can find the produce, meat cuts, and spices that are staples. Modifications are also easy if you can’t find an ingredient or prefer a different vegetable.
Will I have to buy a lot of ingredients I’ll never use again?
The meal plan does a good job of using up ingredients from previous recipes/plans, so the more you use it, the more efficient you’ll be. I’ve bought more vinegars, cooking wines/sauces and spices than I did previously and definitely buy a wider variety of produce and meat cuts but have really enjoyed the variety.
Will I spend more at the grocery store on this meal plan?
That depends on your current habits! At first, I thought my grocery bills were a bit higher due to more fresh produce and higher quality meat than I’d previously purchased, but I noticed a BIG difference in how little we were throwing OUT because we had less leftovers that were forgotten, less ingredients spoiled before we used them (lack of planning) and although we don’t eat out frequently, having a meal half-prepped and already planned for the night GREATLY reduces the impulse to order take-out or make frequent “filler” trips to the grocery store. Overall, I’ve kept my grocery budget at $600/month for a family of 5 including ALL paper/cleaning goods as well. (LCOL area)
What are the recipes like?
A variety is offered every week, but there is usually one meatless option. Other things on the menu frequently: sheet-pan dinners including meat and veggies, whole wheat pasta dishes, stir-fries, soups, salads, Mexican and Asian-inspired meals, “meat and potatoes” meals, slow-cooker recipes (can be modified to Instant Pot). A LOT of the meals are stove-top skillet-type meals, so you’ll want a large high-walled skillet with a lid, but no other special equipment should be needed.
This is my favorite baby gift or 1st birthday gift – a practical way for parents to save a few treasured keepsakes over the years without getting overwhelmed. The key, as with most organizing attempts, is to have a proper place for everything.
The main idea is to have a file folder ready for each stage in the child’s life and limiting the things kept to just what fits in the file, so you have one place to store important documents (like immunization records) but also fun stuff like drawing and writing samples, certificates, and annual school photos.
Here are step-by-step instructions on making a custom file storage keepsake box for your kids or as a gift.
Supplies:
Plastic File Box. I picked up a Sterilite Large Nesting Show-off at Walmart in the storage solutions section for about $6. (Much more expensive on Amazon.) You can order at Walmart.com but only for store pickup). I like the clamp-on lid and handle and it will work for several years. I have already replaced my 3rd grader’s with a Legal/Letter File Box, but no need to store that size until you need it.
Hanging File Folders. For my project, a box of 25 is enough. You can get multi-colored file folders at Walmart or other office supply stores. I ordered the jewel-toned file folders from Amazon when I made them for my nieces.
File Labels. You can certainly hand-write on the file labels that come with your folders, but I created mine on the computer, then printed them on cardstock, cut them out, and inserted them in the clear file tabs
I used a table in Microsoft Word with each row 0.6″ high and each column 2″ wide and typed in the file name. I also added a shape on the left side and put a symbol on it to correspond with each label. If you’d like to use these, just copy one of the label designs at the end of this post and paste it into a Word document, then print!
Here’s a list of the files and ideas for what to include in each one.
Baby Info: footprints and bassinet label from the hospital, birth announcements, etc.
Medical: immunization records, check-up records
Certificates: copies of birth certificate, awards they earn when they are older
Church: baptism certificate, projects they complete in church
Cards/Letters: a copy of our Christmas card/letter each year and any special cards/letters they receive that they want to keep
Pictures: professional photos/school pictures. Just a few from each year to use for graduation display, etc.
Sports: certificates, ribbons, articles as they get older
Interview: I want to do an “All About Me” interview on their birthday, so I printed 18 of this version so they are all ready to be filled out each year.
Age 0-3: artwork, projects from the early years, notes of funny things they said or did
Age 4-5: preschool report card, special art projects, CD of pictures
Kindergarten-Grade 12: report card, special projects or papers, etc. The goal is to limit it to only what FITS in the file.
Blank: I added one extra file just for anything else that might pop up as a category according to their interests, like Music, 4-H, etc.
Now, it’s just time to put all the files in the box, add all the folder labels, and fill them! I did my boxes from right to left, one space apart so I could see the symbols.
I did my niece’s left to right 2 spaces apart so you could read the whole label.
If you’re feeling really crafty, you can add a cute label to the front. I found it better to place them on the inside of the box and stick on with packing tape. Other ideas are to cut out vinyl if you have a Cricut or use paint-pen markers to just write on the front.
That’s it! For less than $20 and in just an hour or two, you can be ready to keep your kids organized for the next 18 years! This is also a much-appreciated baby gift!
It’s definitely worth putting together while your kids are young and you can modify it to fit your lifestyle. You can keep the files in a filing cabinet, add files as needed, purge things at the end of the year to keep only the most important things, etc. It’s just a system to get you started.
Be sure to PIN THIS blog post if this is something you want to come back to later!
BONUS: Save any of these label sets as an image, insert into a Word document and print! If you need to check sizes, each cell should be 2″ wide and 0.6″ tall.
We just returned from a 7-day, 6-night family vacation to the Black Hills of South Dakota and had such a fun trip! Since I found family vacation itineraries helpful in planning for our Black Hills Trip, I wanted to share mine and include some tips for maximizing your trip and how to keep it more affordable.
First a few details. We are a family of 5 with kids ranging from age 3-8 so everything on our trip was geared toward those ages. We are glad we waited until our youngest was old enough to walk/hike herself, but went before our oldest outgrew some of the popular kid-friendly Black Hills attractions. We drove in from the East so Days 1 and 7 will only make sense if you’re coming from that direction. We took a mini-van with lots of snacks, soft-side coolers, and comfortable clothes. Sunscreen and bug spray are a must.
Lodging: Comfort Inn & Suites near Mount Rushmore (Hill City, SD)
We opted for a 3-queen bed hotel room over a cabin and it worked great for us. It’s hard to find hotel rooms to fit a family of five comfortably, but having a large room with 2 queen bed plus another room with a queen bed/chair/dresser/TV for mom and dad fit the bill perfectly. We had a free hot breakfast every morning with many options including Belgian waffles, eggs and sausages, all the staple continental options, fruit. etc. It was handy having an indoor pool and hot tub because we mostly swam when it was raining. The kitchenette included a microwave, coffee maker and mini fridge with freezer! This was key to allowing us to pack a picnic and cold drinks everyday while actually freezing our ice packs. There are many lodging options but I am not the camping type and I would highly recommend this hotel in particular. Located in Hill City, it’s very centrally located to all Black Hills activities, clean and updated and had a well-run breakfast.
How to save: I booked at least 6 months in advance since prices change as you near the summer. I became a Choice Privileges member (sign up here to get 500 bonus points after your first stay) and opened a Choice Privileges credit card and met the minimum spend of $1000 in 90 days to get 30,000 bonus points. The points ended up being worth about $230 worth of free lodging and I bought some points to get an even 2 nights paid with points. The points we earn paying for the other 4 nights (12,000+) will net us a free night for a regular room at a later time.
Day 1: Travel via I-90 from the East into Hill City
Enter a caption
Chamberlain Rest Stop
Chamberlain, SD
Take a rest stop between exits 263 and 265 on I-90 near Chamberlain, SD. View the statue “Dignity” honoring the Dakota and Lakota tribes, view the Lewis & Clark exhibits indoors, and take the short trail to an overlook of the Missouri River.
Ways to Save: FREE plus includes lots of visitor guides you can take for your trip.
Verdict: Great rest stop and a beautiful statue. Take the short hike if you have time.
Minutemen Missile National Historic Site
near Philip, SD
Stop at the Minutemen Missile National Historic Site Visitors Center just off I-90 on Exit 131 and view exhibits and a video about the Cold War-era missile program. We also drove 15 miles west and used exit 115 to get to the Delta 09 missile silo. This is on a gravel road and parking is limited. An audio tour is available via cell phone.
Ways to Save: FREE unless you want a ranger-guided tour of Delta 01 silo
Verdict: It was interesting and had nice bathrooms, but not a must-stop if you’re not a history buff.
Wall Drug
Wall, SD
After seeing 87.5 signs along our route (we had fun keeping track), you can’t NOT stop at Wall Drug. After parking, we headed straight through the shops to the “Backyard” for free ice water and lots of photo ops on a giant jack-a-lope, rail car, covered wagon and bucking bronco.
Ways to Save: FREE unless you want to buy a souvenir, food, or coin-operated fortune teller. We didn’t buy anything and enjoyed the free ice water.
Verdict: You have to stop once in a lifetime and the pictures were fun.
Reptile Gardens
Rapid City, SD
Since the weather was great, we decided to visit Reptile Gardens on our way through Rapid City. We arrived around 4:00pm and were able to catch the Bird Show, Snake show and Gator Show, then toured the indoor exhibits and left around 6pm. The gator show, especially, was entertaining and the colorful flowers makes this fun for everyone to see. Petting a 112-year-old giant tortoise and a python are things they haven’t done before!
Ways to Save: Our family’s entrance fee was $60 and if you ask for a “vacation pass” it will get you in for your entire stay. We didn’t end up coming back, but some might want to. You could get nickel-and-dimed to death here with tons of coin-operated add-ons but we didn’t not do any of those and didn’t buy any food. Prep your kids if you don’t plan to spend any money inside the park.
Verdict: The kids really enjoyed this as their first paid “attraction” and 2 hours was enough time to see everything. You could skip the snake show, but don’t miss the gator show. Trey was a great guide. This would be good for all ages and is not that large so it’s easy to walk around without needing a stroller, plus 4 and under is FREE.
Desperado’s
Hill City, SD
After checking into our hotel, we went downtown in Hill City to find dinner and had a 15-minute wait at Desperado’s. It’s an old log-hewn building and good comfort food. I had a terrific chicken fried steak with mashed potatoes and green beans.
Ways to Save: Consider having your kids share meals (2 kids meals for 3 of them) or eating off your plate if they don’t generally eat a lot.
Verdict: Nice meal, great waitress (Cheyenne) and good food. We recommend!
Day 2: Wind Cave, The Mammoth Site, Needles Highway, Silver Dollar Saloon
Wind Cave National Park
11 miles north of Hot Springs, SD
We drove south to Wind Cave National Park to the visitor’s center and signed up for the Natural Entrance Cave Tour. These tours are first-come, first-served, so we were glad we got on the next tour starting in 30 minutes which is enough time to see a few exhibits. We had a great guide, Ranger Joe, and heard about the discovery and history of the Wind Cave and then walked the 1 hour, 15 minute tour. Our 3-year-old was a trooper, but I could see some younger kids getting scared as it’s tight, steep and dark in places. Not the traditional stalactites and stalagmites since it’s so far below the surface, but neat to see if you’ve never been in a cave.
Ways to Save: The fees for this tour were $12 for adults, $6 for kids 6-16 and 5 and under were free. There is a cheaper/shorter tour if you have younger kids. I’d go first thing in the morning.
Verdict: Fascinating to hear about the history and then see the cave formations. Nice to go to a National Park cave and not a commercialized one. The kids thought it was cool but not their favorite part. Educational, though. Do not go if you are claustrophobic.
The Mammoth Site
Hot Springs, SD
Hot Springs seemed like a cool little town but we didn’t explore much, just drove through on our way to The Mammoth Site of Hot Springs, SD. The dig site itself contains 60+ mammoth who were trapped in a pond created by a sink-hole and it’s an active site where you can even talk to the archaeologists in the lab as they work. We did the video, then a tour with headphones that hurt the kids ears with a slightly unenthusiastic guide. No one was “working the dig” at the time. There were a few other exhibits to see and a sand box with a few “fossils” to brush off, but not as much interactive stuff for kids as I had hoped. I believe you’d have to sign up for one of the “educational classes” for your kids to actually do stuff, but you had to be 4 to sign up, so we didn’t stay for that.
Ways to Save: We paid $10.15 per adult, $7.37 for kids 4-12 and 3 and under was free for the guided tour. We didn’t do the Jr. Paleontologist program which would have been another $11.06 per child and didn’t buy any souvenirs. We actually ate our lunch during the drive from Wind Cave to Hot Springs.
Verdict: For some reason, our kids just weren’t into it. I’m sure some love it, but ours were just not “digging it”. If we ever headed this way again, we’d probably check out Trout Haven Ranch (catch and keep your own trout from stock ponds) in Buffalo Gap north of Hot Springs.
Needles Highway
Custer, SD
We were planning to head to Sylvan Lake and since all the kids were sleeping, my husband convinced me to take the Needles Highway. Here is a good recap from some other travelers. I get extremely carsick and did 100% of the driving in South Dakota. I would have been puking as a passenger for sure. The kids woke up by the first overlook we stopped at and thought the tunnels and mountain goats were cool. We ended at Sylvan Lake Day Access parking lot and had just climbed to the top of a big rock when it started to rain. It was a fast jog back to the van to beat the downpour (and hail) so we decided to come back to the lake a different day and swim
at the hotel instead.
Ways to Save: It costs $20 for a week pass into Custer State Park, but worth it if you want to drive the highway and spend time at Sylvan Lake or hiking other areas of the park.
Verdict: Not for the motion-sick members of your family or large vehicles, but neat for everyone else. It does take 45-60 minutes so plan on it and be careful. Next time, I’d pick up a Junior Ranger handbook at the ranger station as we entered near Custer and would explore more of Custer State Park.
Silver Dollar Saloon
Hill City, SD
We were looking for pizza for supper and stopped south of Hill City at a saloon with good reviews. It was a very laid-back find-your-own-table cash-only takes-a-while sort of place but we ordered a 14″ pepperoni/cheese and a 10″ chicken fajita pizza and polished it all off. Watched the Home Run Derby and unwound from the day
Ways to Save: We saved a lot by ordering pizza to share ($32 with tip) and had our customary water to drink. Watching other families order apps, entrees and multiple beers made us realize it’s not so much the prices at the restaurants, it’s what you choose to order. The cheese curds did look amazing though.
Verdict: Excellent pizza, friendly staff, just be prepared for very laid back “leave the cash on the counter” atmosphere. Would go again.
Day 3: Mount Rushmore, Alpine Slide, Cosmos Mystery Area, Old-Time Photos, Powder House Lodge
Mount Rushmore National Memorial
Keystone, SD
We arrived at Mount Rushmoreby 8:45am before it got busy. Avenue of flags was nice. Go down into the balcony seats of the amphitheater for less crowded pictures. Take the Presidential Train around to the left and read about the presidents (part of the trail is closed). There was an activity area for kids near the teepee. We watched the movie inside and explored the exhibits-the favorite being selecting a spot on the memorial and then watching it explode as you pushed down the dynamite pump. This was one of the only gift shops we browsed and picked out Christmas ornaments to commemorate the trip.
Ways to Save: Pay $10 for parking and you can get in all week (we came back another night). Bring your own water and snacks if you don’t want to be allured by the ice cream. We did not pay for the audio tour and thought the free movie gave enough info.
Verdict: You simply have to stop here when in the Black Hills. Parking wasn’t as ominous as I thought and there are new speed-parking terminals coming this fall! Don’t skip the trails.
Alpine Slide at Rushmore Tramway Adventures
Keystone, SD
The Alpine Slide is just off the highway in Keystone and there are several other things to do like a zipline, ropes course, etc. but we were keyed in on the Alpine Slide. A ski lift takes you to the top of the (very tall) hill with a distant Mount Rushmore view on the way. You go down the track on a cart controlled by stick-break. Kids 6 and under have to go with an adult, but all of us really had fun and if it weren’t so expensive, would have done it again. We went in 2 groups so the others could take pictures/video. There is more to explore in Keystone, but since we were trying to spend money on experiences instead of candy or souvenirs, we moved on.
Ways to Save: One ride is $12 for age 7-adult and $6 for ages 2-6, so we paid $48 for one trip up the lift and one ride down the hill. You can buy 10 rides for $85 so do that right away if you want 2 rides, especially if your whole party is over age 6.
Verdict: Very fun, even if it feels short. If you have older/braver kids, they might like the other things this park offers and could do a more complete package. Operators were happy and helpful.
Cosmos Mystery House
Keystone, SD
The Cosmos Mystery Area is is an unusual attraction offering guided tours through an area that seems to have a different gravitational pull than normal. They go through a series of experiments where water flows uphill, balls roll the wrong way on a slanted board, and people appear shorter, then taller than each other. Here’s a video that helps explain it better. I skipped the tour due to motion sickness and everyone seemed to come out of it a little woozy, so beware. We also let the kids hunt for geodes in the sand pile and then crack them open since one of our kids is really interested in geodes. We ate our picnic lunch on their umbrella-covered tables as it was a gorgeous day again.
Ways to save: Tickets are $11 for adults, $6 for ages 5-11 and free under 5. Geodes are $8, but only $6 if you add them to your tour tickets. So, we spent $41. The geodes aren’t a must-do if your kids aren’t into that.
Verdict: Those who went on the tour didn’t feel great afterwards but they were kind of amazed or at least intrigued by what they saw. Not sure it’s a must-do and wouldn’t recommend for anyone with motion sickness.
Professor Samuel’s Portrait Emporium
Keystone, SD
We checked out several “old-time photo” places in the Black Hills and it’s hard to find pricing unless you call or walk in and depends on the size of your group and what you buy to print/add on as a CD. We actually meant to go to a different one in Keystone but walked into Professor Samuel’s by mistake and their prices were lower and we liked the backdrops better. They only bummer is the other place in Keystone would do different poses like just kids, just mom & dad, etc. and this one didn’t. The costumes fit over your clothes and they are quick to pick things out for you. I wish I’d had a mirror to fix my hair and adjust my hat, but they whisk you through pretty quickly. We changes props and who was smiling but couldn’t change poses/people. The boys loved picking out their own guns and their soldier outfits. You could view your photos right afterwards and choose one to print along with options on frames, then come back to pick them up in 45 minutes.
Ways to Save: We wanted the CD, not just the printed picture, and this was the most affordable one we saw. We bought an 8×10 with frame for $77 and added the CD for $35 (at other places, the CD was $50).
Verdict: Quite a bit to spend but it was fun and we both had done this as kids and remember seeing those photos for years afterwards, so hopefully it will be a lasting momentum of our trip. I suggest asking for pricing and looking at the samples before committing to a certain place.
Powder House Lodge
Keystone, SD
Just outside of downtown, this was a restaurant attached to Powder House lodge. After a short wait, we were seated and had excellent service from the staff and host and a great meal. I had the Louisiana Cajun Pasta which was amazing, my husband had the Powder House Chicken, all served with bread and salad. The kids chicken strips were huge! There is also lots of game-style meals to choose.
Ways to Save: We spent around $50 on this meal with tip (waters all around of course) but it was a great family meal. We took leftovers of my meal and the kids’ to supplement supper at the hotel next night.
Verdict: Very enjoyable experience and would recommend. There is a nice patio, but it was storming that night (driving rain on the way home).
Day 4: Bear Country USA, Storybook Island, Pizza Ranch, Dinosaur Park, Mount Rushmore Lighting Ceremony
Bear Country USA
Rapid City, SD
A trip to Bear Country USA was one of the most-recommended activities and it did not disappoint. This drive-through wildlife park had reindeer, big horn sheep and of course, bears, right up close to our vehicles. Plenty of photo opportunities. We also visited the smaller animal exhibits at the end and enjoyed watching the bear cubs play. We went first thing in the morning and have heard the animals are more out and active when it is cooler.
Ways to Save: You pay per person and it’s not a cheap attractions. $17 per adult, $11 for kids 5-12, so $56 for our family. We didn’t buy any concessions as we had water bottles and snacks along.
Verdict: Kids loved seeing the animals up close and the bear cubs were a lot of fun too. Definitely recommend for all ages.
Storybook Island
Rapid City, SD
Storybook Island is a free park/playground geared towards kids ages 2-9. There are lots of swings, slides, and jungle gyms to climb but they are all incorporated into famous storybook settings and characters. Our kids loved acting out the 3 Little Pigs running from house to house and especially liked the slides coming out of houses. There is even a designated area for kids 5 and under. Tons of cute photo opportunities
Ways to Save: FREE admission! They route you through the gift shop, so be prepared on the way out. You can picnic outside the park but they encourage you to use their concessions and not bring your own food inside the park.
Verdict: Our kids ages 3-8 had a lot of fun here and burned off energy. They didn’t know all the characters (Raggedy who?) but liked to see and try everything. Bring water bottles and sunscreen. Above age 9 might just be too old for this type of playground.
Pizza Ranch
Rapid City, SD
We are quite familiar with Pizza Ranch, a chain of buffet restaurants across the Midwest, and knew it would be a great vacation destination since you don’t have to wait, everyone can choose exactly what they want (and we knew they liked the food) and my sons were most pumped that they didn’t have to order water (drinks are included)! Ha! They filled up on pizza, fried chicken, salad, fruit, veggies, pudding, chicken fingers, ice cream and cactus bread dessert pizza. We requested a pepperoni & jalapeno stuffed-crust pizza and they brought it right to our table to make sure we got as much as we wanted before putting it on the buffet. Hot and delicious! There are 2 locations in Rapid City, SD and a few more in the area (Spearfish, Sturgis, and if you are traveling I-90 back east, Mitchell, Hartford, Sioux Falls, and Luverne, MN).
Ways to Save: This was our MOST affordable family meal of the trip and we definitely got the most variety of food. Kids Buffets at this location are free for 3 and under and we went on Kids’ Day (Wednesday in Rapid City-it’s Tuesday most other places) so each of our other 2 kids were free with the purchase of our 2 Adult buffets. We also went at lunch instead of dinner when the prices are lower. We paid $21 for the whole family to eat as much as we wanted, including drinks!
Verdict: Pizza Ranch is always a winner with our family and we like visiting them on our trips. Full disclosure: I work for Pizza Ranch…but I recommend it because it is family-friendly, fast, affordable, and makes everyone happy!
Dinosaur Park
Rapid City, SD
This is basically a winding road that leads to a bunch of stairs that lead up to a hilltop with 7 big dinosaur statues. A storm was coming in as we stopped here, so we couldn’t stay long. It does provide incredible “100-mile views”
Ways to Save: The attraction is free, but there is a concession stand. The brochures we saw at the rest stop visitor centers and in our hotel lobby had a coupon for a free bag of popcorn at the concessions, but we didn’t take advantage since we had just eaten.
Verdict: The statues themselves are not a must-see, but the views are pretty great. One funny thing is we quickly stopped at a pull-off on the way out and as my husband was taking pictures of the panoramic view of a lightening storm, he looked down and saw a small memorial dedicated to someone who was struck by lightning in that spot while watching the wildfires. Yikes!
Mount Rushmore Lighting Ceremony
Keystone, SD
We arrived at Mount Rushmore around 7:45pm and had enough time to take the trail to the right (towards the Sculptor’s Studio which is closed) and then took the “Nature Trail” back to the entrance. It was a gorgeous night and we were about the only ones on the trail. We took a seat in the amphitheater around 8:15pm. Patriotic music plays for a while, a Ranger talks at 9:00pm, then plays a video about Freedom. They then light the monument and invite all veterans and active duty military to the stage for a flag-lowering ceremony. It was moving and a nice way to spend an evening.
Ways to Save: Since we had already paid for parking, this entire event was free. We packed snacks and drinks so we didn’t buy any concessions.
Verdict: We thought it was worth it. Older kids and adults probably appreciate more. Definitely go if someone in your party is a veteran. Bring jackets and possibly wear pants or bring a blanket. I also recommend bug spray. If you only have time to visit the monument once, I think you could arrive by 6:30 and see everything, then stay for the lighting ceremony.
Day 5: Sylvan Lake in Custer State Park, Wade’s Gold Mill, Hubcap Diner, 1880 Train
Sylvan Lake
Custer State Park
We headed back to Sylvan Lake to try some hiking trails. Our kids are a little young for the 7-mile round-trip Harney Peak trail, so we parked in the Sylvan Lake Day Access and walked to the back of the lake to the Sunday Gulch Trailhead. We went counter-clockwise and were tipped off that the heavy rains had turned the end of the trail coming out of the gulch into shin-deep rushing water over the rocks, essentially climbing up a waterfall which didn’t seem great for our 3-year-old. So we ended up hiking in about 1.5 miles of the 4-mile trail and then back out. Very fun hike with lots of rocks to climb and things to see. We changed into swimsuits (there is a bathroom with running water. Yay!) and then played on the beach and in the water and climbed the big rock. Water is cold and it would be more fun with sand toys or floating tubes, etc. Gorgeous, iconic scenery. You can rent paddleboards and kayaks, but we were content just cooling off by the sandy beach.
Ways to Save: We had already paid the $20 entrance fee to Custer State Park and packed a picnic for lunch.
Verdict: Kids handled hiking better than I expected and we’d like to do the other trails. Bring sunscreen, bug spray, snacks and plenty of water especially if you do the round-trip. Fun place to swim.
Wade’s Gold Mill
Hill City, SD
The kids were keen on panning for gold and Wade’s Gold Mill had great reviews, however the heavy rains flooded their creek and washed out their bridge/seating area in the stream, so we had a different experience than most, panning out of troughs. Kids got a vial of sand and were taught the panning process. We skipped the video. Each child got several flecks of gold to keep and lots of garnets. The place looks like it hasn’t changed in decades and many people appreciate the “authentic” non-commercialized site.
Ways to Save: We weren’t there in time for the tour, so we just paid $12/kid for the gold panning lessons which came with a vial guaranteed to have some gold, plus the chance to dig for another pan. They all got garnets from their dig but no more gold.
Verdict: If you’re not into the history of gold mill equipment, I’d skip the tour. The kids seemed satisfied with the panning but were ready to leave after one pan. I was a little disappointed, but I feel we would have had a different experience if the creek had not been flooded.
Hubcap Diner
Hill City, SD
We were looking for good burgers and this place had great ones along with hot fresh fries. It’s 50’s diner decor and the specialize in milkshakes but at $5/piece (no kids sizes, no meal deals with a burger) we didn’t spring for them.
Ways to Save: We originally intended to get burgers and shakes, but with shakes being $5/each with no kids sizes and no “meal deals,” we ended up just getting food and stopping down the street at DQ for mini blizzards afterwards (which were $4.19, so joke’s probably on us.)
Verdict: Good burgers, corndogs for kids, fun coloring sheets, more expensive than we hoped.
1880 Train
Hill City, SD
A restored steam engine pulls passenger cars at 10 mph from Hill City to Keystone and back on the 1880 Train. I bought tickets online about 10 days in advance for the 6:45pm Thursday train out of Hill City which is the only time they do the Old West Shootout. I highly recommend buying tickets ahead of time and choosing your seats especially if you want to see the shootout. Reserve seats on the right/passenger side of the train from Hill City to Keystone in the middle of the train for the best view of the shootout. Then choose seats on the opposite side of the train for the ride back so you can see different scenery (the seat backs flip around for the ride back–so you want to move across the aisle to the other side.) I highly recommend the “enclosed” cars over the “open-air” cars because they have padded seats and the windows are much lower, allowing small children to see out. The open-air windows were so high I had to have my 3-year-old on my lap to see anything and my 5-year-old could barely see sitting on his knees (you cannot stand). The shootout is pretty “volunteer”-quality but it gives the kids a distraction. It was relaxing at night and our 2 youngest fell asleep on the ride back. The ride is narrated, but it’s hard to hear if you are near the engine. I recommend the Oreville car if possible. If you don’t want to see the shootout, I’d recommend taking it to Hill City, looking around Keystone for a few hours, then taking it back later.
Ways to Save: This was our most expensive attraction at $109 ($29 for adult, $14 for kids 3-12). We brought our own snacks (the ones for sale on board aren’t terribly expensive) and didn’t purchase the beer and wine available on the train.
Verdict: It was fun to do and we saw a lot of deer and scenery. The shootout isn’t a must-do but was fun for our kids to get the blanks casings from the shooters. Just decide if the $ is worth it for your family and definitely reserve online ahead of time-just pick up your tickets 30 minutes before departure.
Day 6: D.C. Booth Historic Fish Hatchery, Spearfish Canyon, Deadwood, Harry’s Spaghetti Western
D.C. Booth Historic Fish Hatchery
Spearfish, SD
We took an 80 minute drive north to Spearfish and started at the D.C. Booth History Fish Hatchery. There is lots to see and do here as we fed the fish and ducks, viewed fish underwater, did a scavenger hunt in the museum, toured a replica fish rail car, and took the path to some lookouts. There is also a house and garden that were closed for a wedding along with a gift shop and boat.
Ways to Save: This is a FREE family attraction. The only money we spent was on three $1 bags of fish food. Plus if you complete the scavenger hunt in the museum, you can turn in your sheet for a free cup of fish food.
Verdict: This was much more fun and interesting than I anticipated. Nice facility that is well maintained with friendly volunteers. Kids loved feeding the ducks and fish. There is a nice park next to it and we also stopped downtown at the Visitor’s Center for trail maps and great advice on where to stop with kids to hike.
Spearfish Canyon
Spearfish, SD
We took the advice of the Visitor’s Center guide and drove through Spearfish Canyon, stopping at Bridal Veil Falls, then enjoyed the picnic area at Roughlock Falls (there are many hidden picnic tables in the shade but we ate right by the stream). We walked around the boardwalks here, then drove to the Latchstring Restaurant parking lot to take the trail to Spearfish Falls (easy 0.5 mile hike).
Ways to Save: FREE, plus we brought a picnic!
Verdict: Beautiful and worth the drive! You could find more trails if you have older kids, but this was perfect for our family.
Historic Main Street
Deadwood, SD
We arrived around 3:45pm and found a metered parking lot, then walked downtown for the 4:00pm staged gunfight! The kids were sworn in as deputies and then Deadwood Alive performed the short show. We stumbled upon a Model Train exhibit in the basement of a gift shop (across from Mineral Palace Hotel) which the kids really liked and there are “I Spy” cards of things to find. We arrived at Saloon #10 at 4:45pm to get a seat for the 5pm show of Wild Bill getting shot. The actor told his “life story” and then acted out the shooting with some audience participation, then took pictures. We just missed some activities for kids such as playing Go Fish and having Nerf shootouts dressed as cowboys, so check out Saloon #10 in the afternoon for family-friendly activities. We didn’t take any tours and kids weren’t into the history, but it was fun to watch the Deadwood Alive shows.
Ways to Save: All the shows were free and we didn’t do any shopping. We did use an app to pay $2.75 for parking (didn’t have quarters on us). We put $1 in the machine to make the model trains run for 10 minutes–well worth it. We also tipped the Wild Bill show since we had a child take a picture with him.
Verdict: Fun stop and there was more we could have done, but we were hungry and also wanted to get back to our hotel on time to pack.
Harry’s Spaghetti Western Restaurant
Deadwood, SD
After a week of American-style food and the kids eating too many chicken strips and fries, we decided to try Harry’s Spaghetti Western Restaurant based off excellent reviews and the fact it was family-friendly and away from the gaming/alcohol of the saloons. You choose your pasta, sauce and meat and can get a full plate for $14.95 or a half for $9.95. We got a whole spaghetti/meat sauce/meatballs, a whole fettuccine/alfredo/chicken, and a half spaghetti/red sauce/(hot!) sausage. It came with salad, bread and then spumoni for dess
ert. Everything was excellent!
Ways to Save: We shared 2.5 bowls of pasta and paid $48 with tip, but it was a great meal and we appreciated that they allowed us to split it family-style. Ordering water and skipping extra dessert
made this affordable for our family.
Verdict: Excellent family restaurant with seriously good food.
Day 7: Badlands National Park, Mitchell Corn Palace
Badlands National Park
Hwy 240 at Wall, SD
On our way home, we decided to venture South at Wall to travel the Badlands Loop through Badlands National Park. We stopped at the first major lookout and again at Fossil Trail where we climbed many rocks. There are several other stops you could make such as the Ben Reifel Visitor Center and the “Door” but it took about 2 hours to do the loop already, so we continued on our journey home.
Ways to Save: We paid $20 for an entrance fee which is good for 7 days in case you want to return. If you have a 4th grader, you can apply for a free National Parks Pass ahead of time.
Verdict: I’m glad we took this detour to see the varied landscape and the kids really liked climbing the rocks at the Fossil Trail stop.
Mitchell Corn Palance
Mitchell, SD
If you get all the way to the eastern part of the state, you might as well stop at the World’s Only Corn Palace. There are murals made of corn, of course, on the outside and a few exhibits and gift shops inside–right on the basketball flour. Mitchell has a few other tourist stops and is a popular overnight stop for folks who need 2 days to get to the Black Hills.
Ways to Save: Free Attraction. We picked up a present for a birthday party and a souvenir for each child: a stuffed animal, a slingshot, and a play rifle/pistol/handcuff set. They were reasonably priced compared to the gift shops in the Black Hills and it gave them something to look forward to playing with when they got home.
Verdict: Stop, take a picture, look around. You probably don’t need to go several times in your life, but I appreciate the effort and it’s something you don’t see everyday!
***
Overall, we had a terrific fun-filled family vacation to the Black Hills. We saw and experienced a lot of things and made memories together as a family of five. I highly recommend the Black Hills as a family vacation destination and the activities listed for younger kids. We may consider going back when our kids are older and can do more hiking, trail riding, etc.
There is even more to do than I listed here and if you have a Black Hills Vacation Itinerary you’d like to share, I’d love to link to it as an additional resource for families planning a trip to the Black Hills.
Best deals of the year at Kohl’s if you have a Kohl’s credit card and know these hacks to doing it right! It’s ONLY GOOD TONIGHT, November 10, 2017!
$10 off a $25 order
PLUS 30% off
PLUS Free Shipping
1) Make sure you’re signed up for ebates. Use this link to get an extra $10! Then sign in to ebates, search for Kohl’s and click “Shop now” next to the 3.0% cash back. https://www.ebates.com/r/CUSTOM731
2) Use the window that ebates opened, then Log in to your Kohl’s account and save everything you want to possibly buy to your WISH LIST! Remember, some brands like UA, Nike, adidas and Columbia are excluded from coupons (it will tell you in gray text if an item is excluded).
Wish List Tip: If you saved things last night, go to “My Lists” in the footer and you may need to sign-in again on the List window to get to your list.
3) Start adding things to your cart from your Wish List in groups of at least $25, but as close to $25 as possible.
4) Apply the following coupons: VETSDAY to get $10 off a $25 order SPLURGE30 to get 30% off SHIP4FREE to get free shipping
Pay with your Kohl’s Charge Card
5) Once you place an order, go back to your wish list and add another group of at least $25. Repeat until done! Things do not disappear off your list once purchased, so keep track of what you already ordered.
I did at least a dozen orders after midnight last night and paid less than $12 including tax for each order of approx $25-$26 worth of merchandise. It ends at Midnight tonight!
We all know Kohl’s has 30% codes every so often and Free Shipping fairly frequently, but the $10 off $25 only comes around on Veteran’s Day, so don’t miss this deal!
I shared this on my facebook page, so go to the post and TAG your friends who love a good deal!
SHARE this deal with anyone you know who has things to buy at Kohl’s.
COMMENT with some of the deals you’re finding.
I’ve been a budget-junky ever since my parents made me divide my coins into 3 cups (Give, Save, Spend) when I was a toddler… through my elementary years of writing checks and recording them in a paper ledger (I got a checking account in third grade)… into working years of using Microsoft Money and now YNAB to manage my personal budget.
So, it’s probably no surprise that when I decided to jump into starting my own direct-sales business through Rodan + Fields that I would be sure to be on the budget wagon from Day 1.
I had already been using YNAB for my personal budget for a year and found the principles applied well to my new small business. Here is how I used the 4 Rules to make sure I’m seeing financial success in my Rodan + Fields business (besides all the personal satisfaction that comes from helping people discover great skincare that works for them.)
Rule One: Give Every Dollar a Job
When you get that first paycheck, it’s tempting to spend it all on something fun since it’s “extra” income, but you really need to have a plan of where those dollars should be spent. Here’s my breakdown with the example of a $200 check (your approximate check if you reach 600 PSQV through PC sales and reach Executive Consultant level)
Paycheck*: $200
Giving 10%: $20
Taxes 20%: $40
Fixed expenses (Pulse subscription) = $25
Variable Business Expenses 10%: $20
Personal Product: $95
Profit Income: $0
Let’s try it with a higher income check (usually attained through both personal sales and commission from your down line)
Paycheck*: $1000
Giving 10%: $100
Taxes 20%: $200
Fixed Expenses: $25
Variable Business Expenses 10%: $100
Personal Product: $150
Profit Income: $425
Here’s a little more explanation about each category in case you’re new or just curious:
Giving: Obviously a personal choice, but I choose to tithe 10% of my income. I encourage you to find a percentage you’re comfortable with and give it somewhere that is meaningful to you, whether it be to your church, to sponsor a child, to your local food pantry, the R+F Prescription for Change foundation, or even let your customers decide what charities they want their sponsor to support.
Taxes: When you get a paycheck from a regular employer, taxes have already been set aside and paid to the government for you, based on your W2 withholding. This is NOT the same for the commission check you receive from RF Pay Day. It’s up to YOU to save money to pay your taxes at the end of the year. Keeping track of business expenses can significantly reduce how much you owe, but my best advice is to discuss with your tax adviser and make a plan. I’m being conservative and setting it aside as I go, hoping to not owe near this much in April and give it back to MYSELF to spend at the end of the year.
Fixed Expenses: The optional, but encouraged Pulse website costs $24.95/month and you want to be a month ahead–set aside $25 of this month’s income to pay for next month’s expense. If you’re choosing to pay for your cell phone or internet out of your business income, this is a good place for that too.
Variable Expenses: Think about all the costs that pop up each month to help grow your sales: samples, postage, packaging materials, invitations/food/rental for a business launch or consultant event, rebates or sales for your customers, etc. It might take some money to start making money, but you don’t want to overspend on sales and samples, leaving you with no money at the end of the month.
Personal Product: To reach 100 SV each month and qualify for commissions, you’ll get 20 QV from Pulse and will need to achieve 80 QV in product. This can generally cost over $100 when you add tax and shipping. If you find yourself short in this budget or not in need of personal product, consider doing a bulk sales or ordering for family off your CRP. For instance, sell 2 eye creams or 3 mineral peptides + brush, or 4 Essentials and a lip balm. Try to keep it as close to 80 QV as possible but you need at least 80 QV to reach your “100 bucket”.
Profit Income: This is what I personally would feel comfortable “spending” on things outside my R+F business. Use THIS to meet your personal financial goals such as paying down debt, saving for college or retirement, or funding a family vacation.
Budgeting is not about limiting your spending, it’s about getting your money to do what you want it to do.
Rule 2: Embrace Your True Expenses
This is mostly covered in Step 1 since your monthly expenses are part of your budget, but consider this if you want to buy more personal product than what your budget allows (such as a regimen bundle which saves you $ in the long run, but costs much more than $80). You may need to save up for 2 months to pay for that and find other ways to fill your 100 QV, such as retail sales or selling bulk-order products.
I also make myself think about each individual order needing to be a money-maker. You may decide it’s worth it for long-term gain but if you’re just starting out, don’t get caught giving away too much. So, don’t offer a $50 product free on ANY PC order because if someone only spends $80, you’ll be losing money. Don’t offer to reimburse a Preferred Customer’s $19.95 enrollment fee if they buy one time and return it. Don’t offer $100 back on a $695 kit that you only make $90 commission on.
Another tip is if you are offering a big incentive, limit it to what you can afford. Don’t offer to give out 5 Eye Creams if you don’t have the cash this month to buy them–you don’t want to get in the habit of borrowing from next month’s potential check. Use only the money you’ve already earned.
Math is hard, but being broke is harder. Do the math.
Rule 3: Roll with the Punches
This is meant to encourage you to adjust your budget throughout the month if needed. This could happen if you make a retail sale and decide to adjust your personal product sales since you now don’t need as much to reach 100 QV. Or you might decide that a $20 entry fee into a flash sale is a good investment (it was for me) or you want to take some personal profit to buy more samples or pay for postage. Just don’t let your accounts go negative–the borrowed money has to come from somewhere and if it’s not in your R+F budget, it will have to come from your family budget. Under no circumstances do I encourage buying on credit card if you don’t have the funds to pay for it today.
Don’t Borrow from your future, make the sacrifice today.
Rule 4: Age your Money (previously known as Live on Last Month’s income)
Don’t spend money that you THINK you’ll earn this month/receive on PayDay next month. Only spend money you have already earned. For me, this applies to kits too. I used personal savings to pay for my kit (I didn’t float it on a credit card thinking I’d make it back the next month). I did sell several regimens out of my kit right away just to get some cash flow going and invested into next month’s expenses. But if I were trying to pay back a credit card for my kit expenses, I wouldn’t have had much to invest in my business in the beginning.
This rule applies to regular paydays too. If I had a great May, I get that paycheck on June 12 and use it to pay for JULY expenses. It obviously takes a little bit to get in this cycle, but at the very least, try to have your June 12 paycheck pay for expenses that occur after June 12 (move your CRP, don’t offer rebates or buy samples until you get paid).
Only spend money you’ve already earned and received.
Those are YNAB’s 4 Rules that apply to not only personal budgets, but your Rodan + Fields business as well. It works for many other direct sales or small businesses too. Some direct sales companies require you to buy inventory before selling it so your budget will look a little different but the same principles apply. I personally love not having to front money for inventory so I can truly apply last month’s commission to next month’s expenses instead of having to pay off last month’s wholesale purchases.
Interested in learning more about You Need a Budget? They have awesome video training, offer a free 34-day trial AND if you sign up using my link, you’ll get one month FREE when you subscribe.
(An annual subscription after the free trial is $84/year but it will push your renewal date out one month. Full disclosure: I also get 1 month free if you use my link, but it’s the only way YOU get 1 month free, so win-win)
Interested in learning more about starting our own Rodan + Fields business?
*The Rodan + Fields Income used in my illustration was just an example and does not indicate or guarantee your income as an Independent Consultant. Read the full Rodan + Fields Income Disclosure Statement for more details.
Please ask questions in the comments or message me through my facebook group! Part of the reason I joined Rodan + Fields was to help others achieve financial independence and financial literacy is one of my passions. I’d love to help you out or hook you up with other budgeting resources!


 Meal Planning used to be one of my most-dreaded tasks. I would spend literally hours every week trying to cobble together recipes from Pinterest, cookbooks and facebook, write grocery lists, and then forget to do prep steps or misjudge how long a recipe would take from start to finish. I would spend precious time at work worrying about what to make for dinner or wondering if I had the groceries in the house for a complete recipe. I don’t hate cooking and have a deep desire to feed my family a variety of healthy meals, but I just didn’t know where to start.


 This is my favorite baby gift or 1st birthday gift – a practical way for parents to save a few treasured keepsakes over the years without getting overwhelmed. The key, as with most organizing attempts, is to have a proper place for everything.
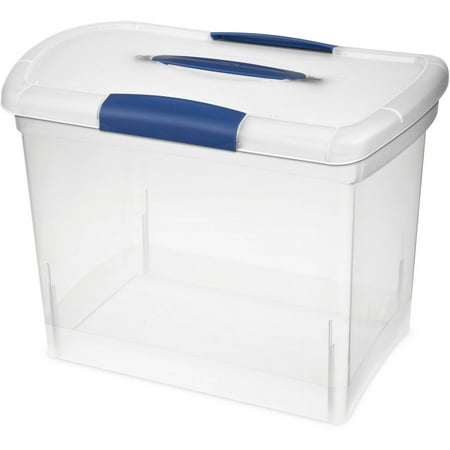


 Interview: I want to do an “All About Me” interview on their birthday, so I printed 18 of


 We just returned from a 7-day, 6-night family vacation to the Black Hills of South Dakota and had such a fun trip! Since I found family vacation itineraries helpful in planning for our Black Hills Trip, I wanted to share mine and include some tips for maximizing your trip and how to keep it more affordable.
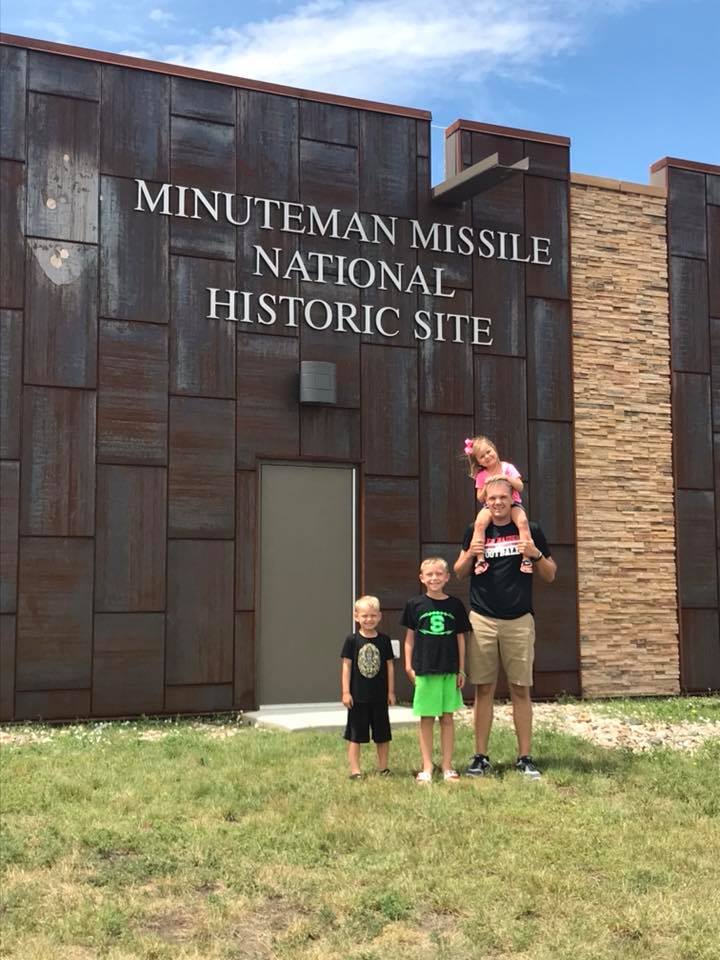 Minutemen Missile National Historic Site

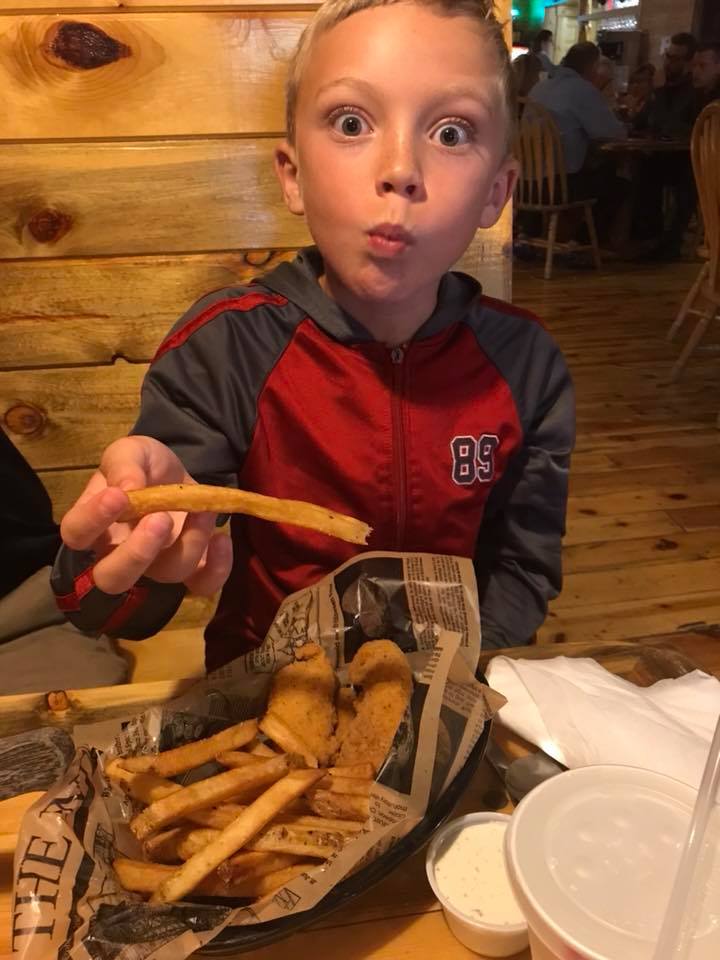


 Mount Rushmore National Memorial
 Alpine Slide at Rushmore Tramway Adventures
 Professor Samuel’s Portrait Emporium
 Storybook Island

 Mount Rushmore Lighting Ceremony
 Sylvan Lake
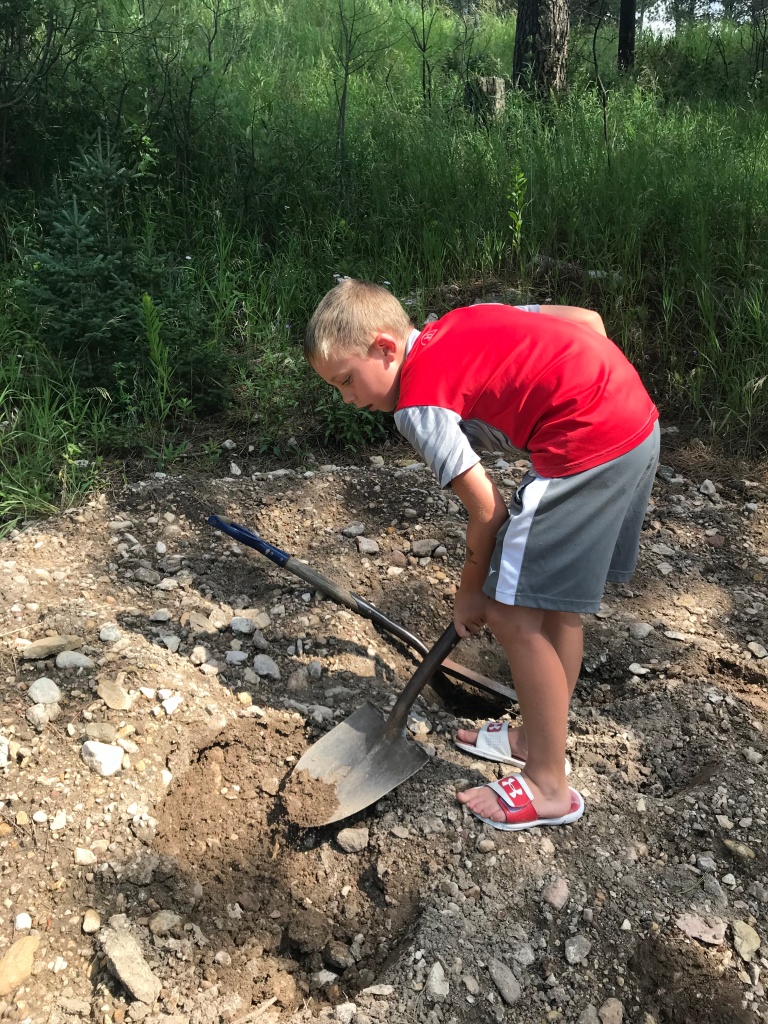
 Hubcap Diner
 1880 Train
 D.C. Booth Historic Fish Hatchery
 Spearfish Canyon


 Mitchell Corn Palance
 Best deals of the year at Kohl’s if you have a Kohl’s credit card and know these hacks to doing it right! It’s ONLY GOOD TONIGHT, November 10, 2017!
